Guide · Dust collection
Dust Collection Ductwork Layout: Main Line, Drops and Blast Gates
Your dust collection ductwork layout decides how well the collector works: a collector only performs as well as the ducts behind it. This guide shows how to plan the main line, the drops to each machine, wyes, elbows and blast gates so the air reaches the machines with as little loss as possible. It is for hobby woodworkers with a single-stage or cyclone collector and covers the layout side; sizing and fire safety belong to the collector maker’s instructions and local code. OSHA names local exhaust ventilation at the source as the primary way to control wood dust.
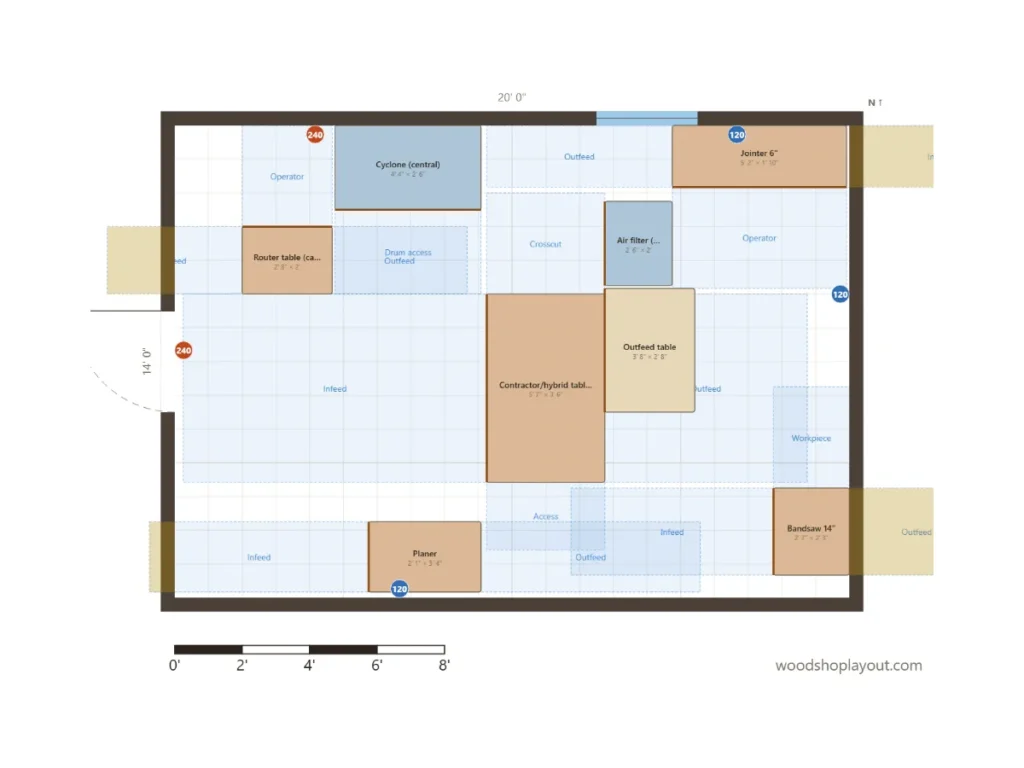
A 14×20 example: the collector sits close to the big machines, so the main line stays short and every drop is close by.
Start with the machines
Plan the duct route after the machine layout
Ductwork is easiest to plan once the machines have their final spots. Place the table saw, jointer, planer and bandsaw where they work best, with their infeed and outfeed space, then put the collector as close to the biggest dust makers as you can. Only then draw the duct: one main line from the collector toward the machines, and a short drop from that line down to each machine.
Every foot of duct, every elbow and every flexible hose takes away some of the airflow that reaches the machine. That is why a good duct layout looks simple: a short, mostly straight main line, few bends, and drops that are as short as the room allows. If you have not decided where the collector goes yet, start with our small shop dust collection layout.
Rules of thumb
How to lay out the ducts
Common planning rules for a home woodshop. Your collector’s manual and performance chart have the final word.
- Run one main line (the trunk) from the collector toward the machines, as straight as possible. Branches come off the main line, not off each other in long chains.
- Put the machines that make the most chips (planer, jointer, table saw) closest to the collector, and the small ones toward the end of the line.
- Use wye fittings (45° branches) instead of tees where a branch joins the main line. A wye lets the air turn gently; a tee makes it turn hard.
- Use long-radius elbows (sweeps) instead of short 90° elbows, and as few of them as you can. Two 45° bends are usually better than one sharp 90°.
- Bring drops down from the main line close to each machine, and keep the flexible hose at the end as short as possible. Flex hose has much more resistance than smooth duct.
- Put a blast gate on every branch, close to the machine, and open only the gate of the machine you are using.
- Size the duct to the collector and the machine ports, and keep the main line at least as large as the biggest branch. Check the collector maker’s chart for your total duct length.
- Plan a cleanout or an easy-to-open section near long runs, so a clog can be cleared without taking the whole system apart.
Parts
The pieces of a duct system
Main line
The trunk from the collector toward the machines. Along a wall or overhead, short and mostly straight.
Drops
Short vertical runs from the main line down to each machine. Most woodworkers run them along a wall or a post so they do not cross a walkway.
Wyes and sweeps
Gentle 45° branches and long-radius elbows keep the air moving. Avoid tees and tight 90° elbows where you can.
Blast gates
A gate on every branch lets the collector pull from one machine at a time instead of from all open ports.
A machine in the middle of the room can get its drop from the ceiling, so no duct or hose lies on the floor in the walkway.
Overhead, wall or floor
Where to run the main line
Along a wall. The simplest route in most garages and basements. Machines that sit against that wall get very short drops. It works best when the big machines are lined up along one or two walls.
Overhead. Running the main line along the ceiling keeps the floor and the walls free and lets drops come down right next to machines in the middle of the room. Leave enough headroom for lifting long boards and sheet goods, and keep the duct away from light fixtures and the garage door track.
On the floor. A duct on the floor is usually a trip hazard and gets in the way of carts and mobile bases. If a machine sits in the middle of the shop, a ceiling drop is often the cleaner solution.
Mobile machines
Ductwork in a small shop with machines on wheels
In a small shop many machines live on mobile bases and move around. A full duct system is not always worth it there. A common middle way: a short fixed line with one or two drops where the machines are used, plus a flexible hose that you move from machine to machine. Give each mobile machine a parking spot and a working spot in your plan, and put the drop where the working spot is.
Keep in mind that wood dust is combustible. Empty the collector before it is full, keep ducts clean, and follow the collector maker’s instructions and your local fire code for duct materials and grounding. If you are unsure, ask a professional.
FAQ
Questions and answers
Should I use wyes or tees in dust collection ductwork?
What size duct do I need for dust collection?
Where should blast gates go?
How long can flexible hose be?
Can the woodshop layout planner help with ductwork?
Your turn
Place the collector, then draw the ducts
Put your machines and the dust collector to scale into your room, check the working zones, and find the shortest route for the main line. Share the link or print the plan.
Keep exploring